How to setup Open Enrollment for your company
This guide will walk you through setting up Open Enrollment for your company.
Text Guide (click on the images to enlarge them)
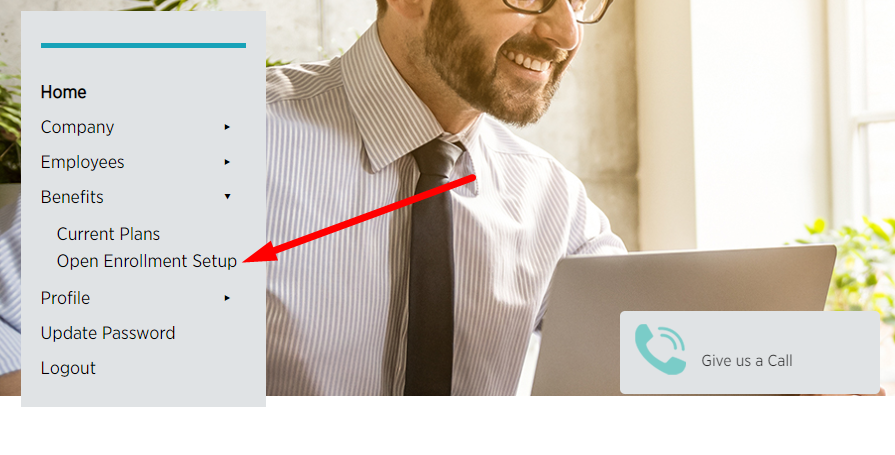
1. Start by logging in to your account. Once you are logged in, click on the "Benefits" menu item on the left hand side of the screen.

2. When the drop down expands select the "Open Enrollment Setup" option.
3. This will load a page that has several sections. On the top you will have three fields: "Open Enrollment Date", "Effective Date" and "Waiting Period".
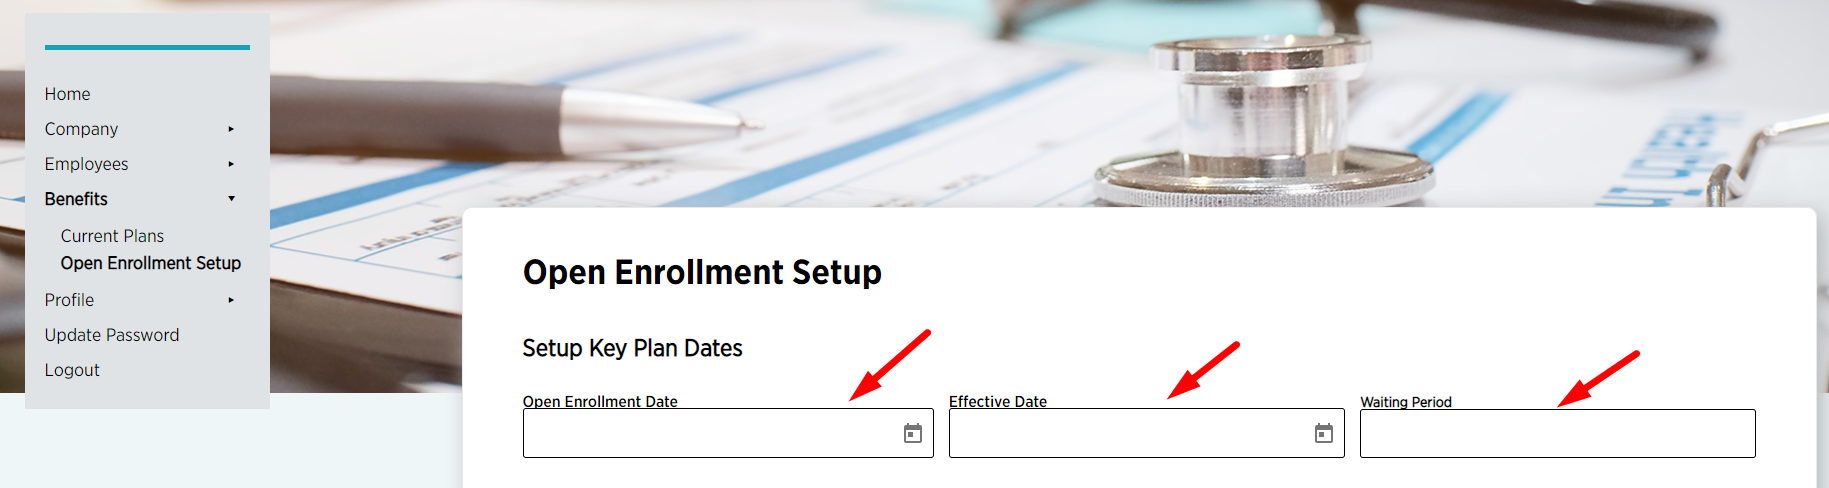
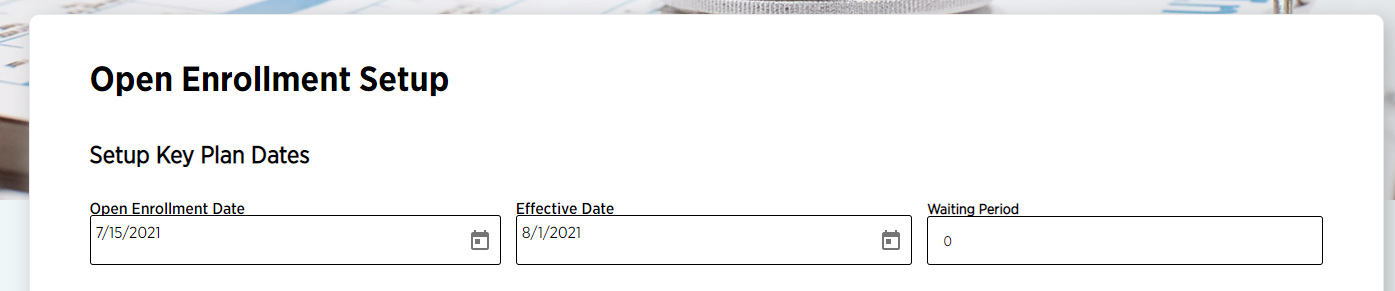
4. "Open Enrollment Date" sets the start date when your employees can start enrolling into their health benefits. The "Effective Date" field sets the effective date and enrollment closes on that date. The "Waiting Period" can be set to "0" (zero) in case you don't want to have a waiting period for new employees.
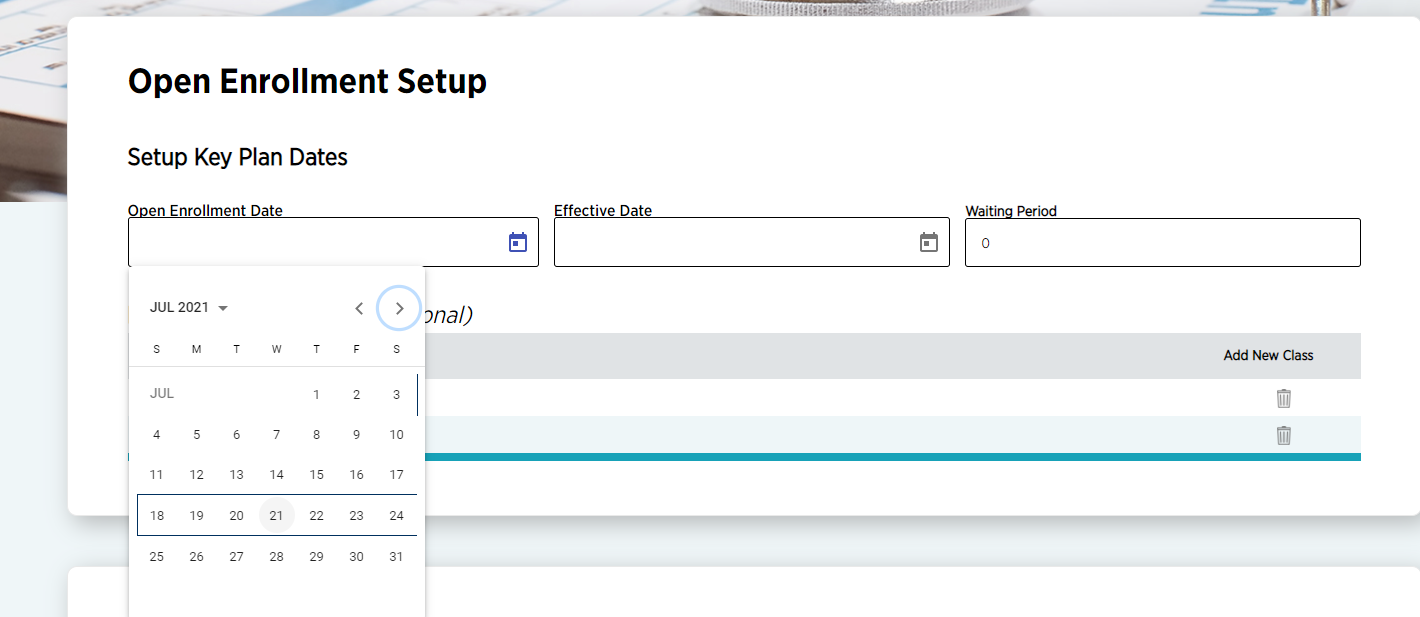
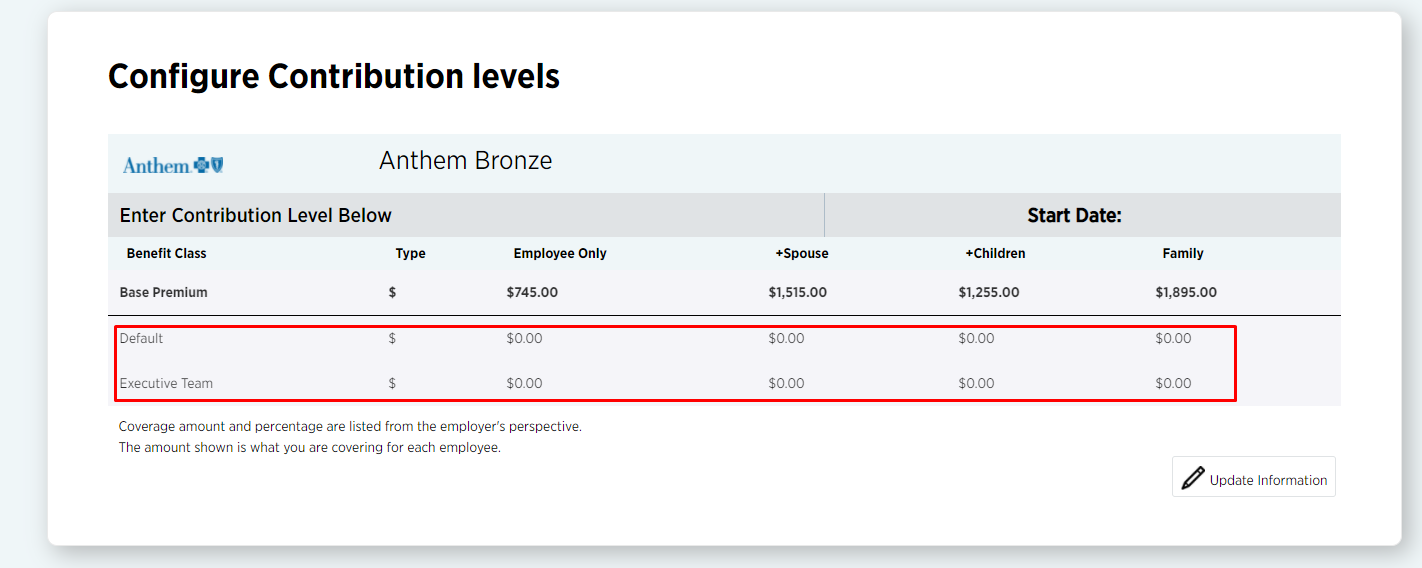
5. Immediately after these fields, you will see the optional benefits classes. By default, you have the "Default" benefits class that is applied to all of your employees. However, if you wish to have different levels of Employer Contribution for some employees, you can add the new class by clicking the "Add New Class" on the top right of that table and set its name.

6. Below this section, you will have a list of all Plans available with the different coverage levels and premiums. You will see the Benefits Classes here and this is the section you set your contribution levels.
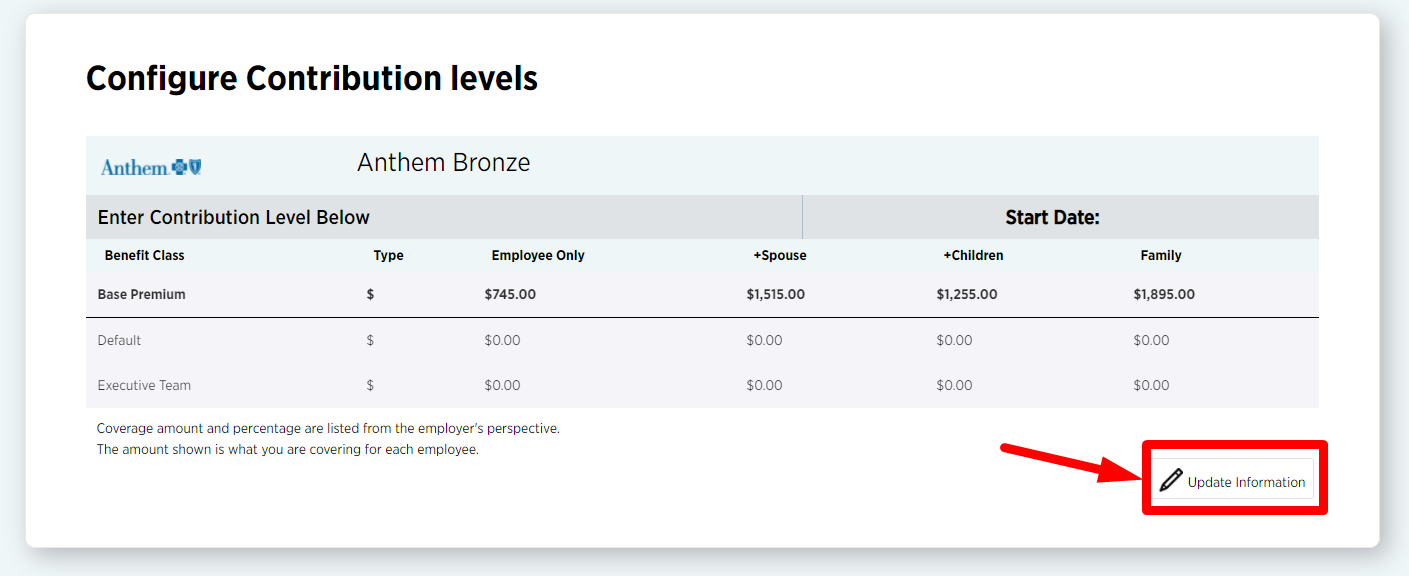
7. To edit these, just press the "Update Information" button.
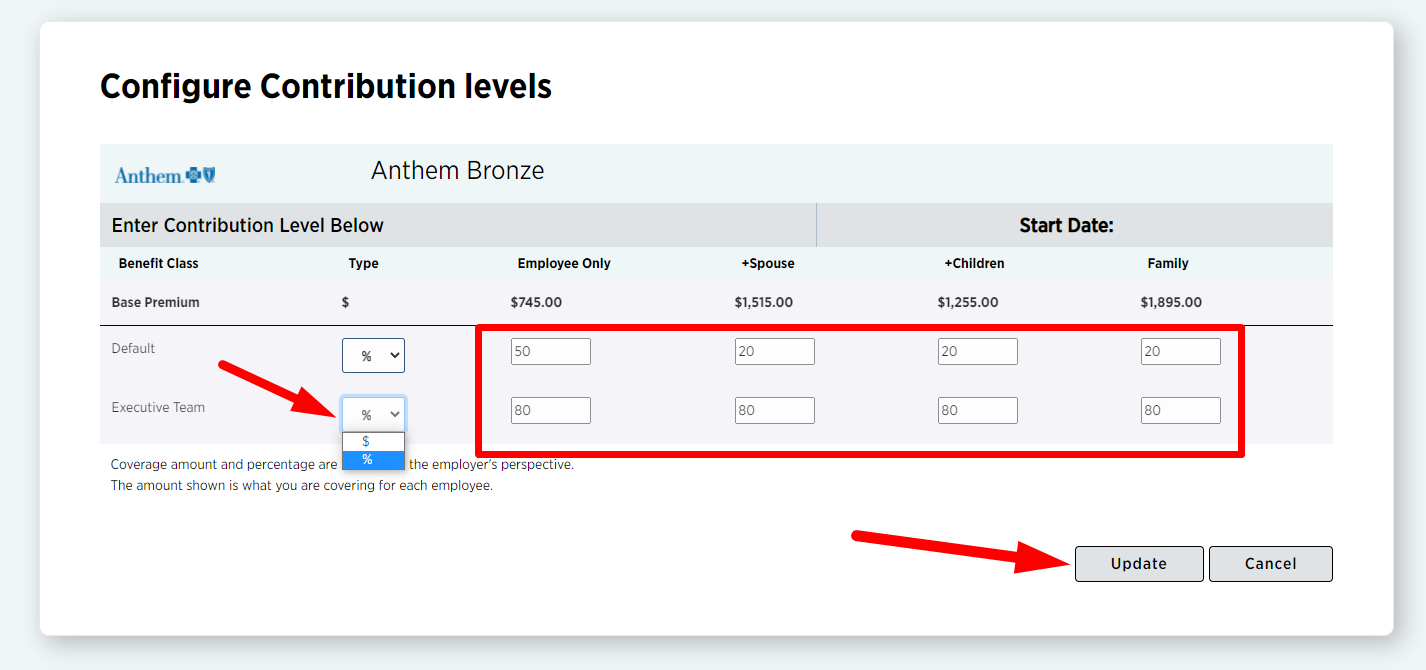
8. You can define the contribution in a fixed dollar amount or as a percentage of the premium. These can be "0" (zero) if you decide so. Once you set the contribution levels, press "Update".
9. Go through all the plans and once you're happy with everything on this page, press "Submit". This will send an email to your employees to inform them that the Health Plan Enrollment has been scheduled.

Congratulations, you have set up Open Enrollment.
Go Back